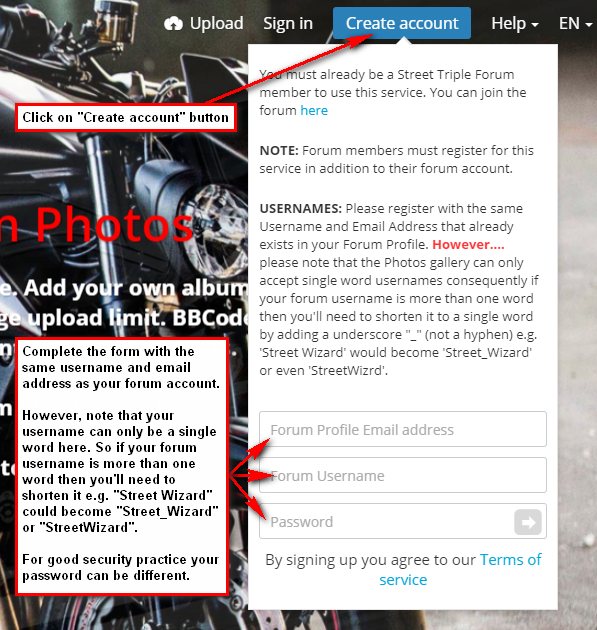
1. Create an Account
Firstly create an account.
Note: Registered forum members need to create a separate account with the Photos Gallery. We ask that you use the same username and email address as your main forum account.
Unfortunately the photos area can only accept single word usernames, so if your forum username is two words then then you'll need to make a single word by joining the words together or adding a underscore (not a hyphen) e.g. "Street Wizard" would become "Street_Wizard" or "StreetWizard".
2. Add Avatar and background Image to Profile
Adding an avatar and a background image to your profile lets you create a great Gallery page for your images
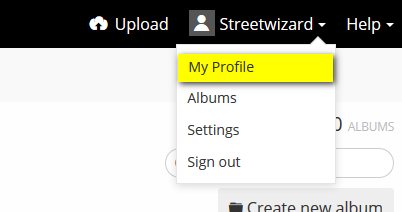
Once logged in go to your Profile area:
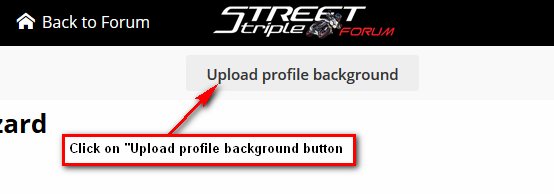
Now click in the "Upload Profile Background" button:
The background image is going to span the whole page so it needs to be fairly large in width.
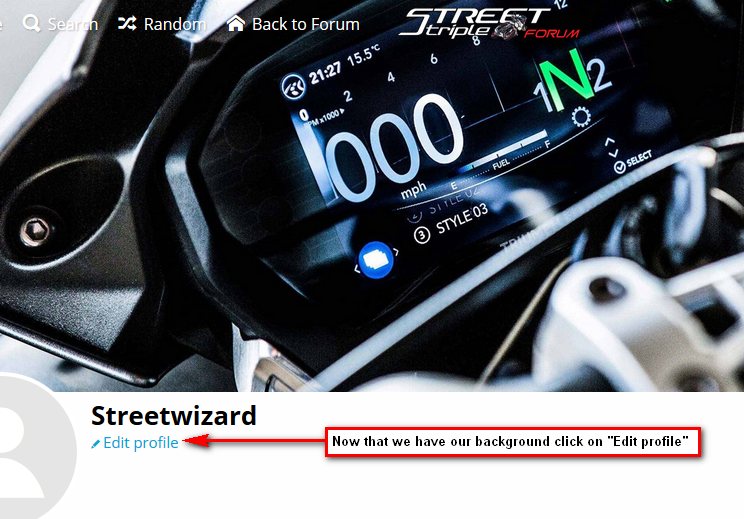
Once uploaded you'll see that our profile area is taking shape. Now we move on to adding an Avatar image. To do this click on the "Edit Profile" button:
Now we add an Avatar image. The uploaded image should be at least 160px. To do this make sure you are on the Profile page and click on the "Upload new image" button:
Once uploaded your profile now has an avatar image to compliment the background:
Thats it. Now you should have a great looking page which looks good when people view your photos. If you make a mistake then simply edit the existing photos.
Now we move on to adding some photos...........
3. Upload your Photos
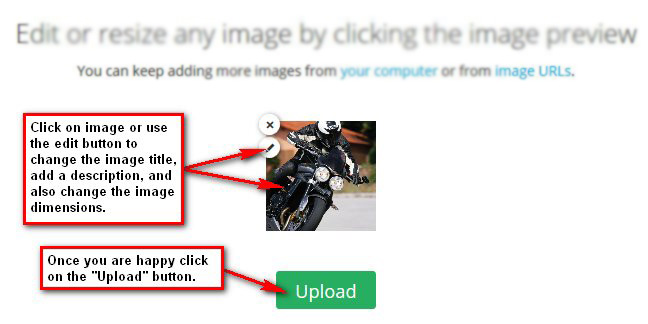
Simply click on the "Upload" button and browse to the images on your computer or device. You can add single images or multiple images all at once.
Images can be drag n dropped onto the uploaded, added by finding the file on your device or computer, or even by adding a list of urls.
Max. upload image size is 6MB. Large images will automatically be resized to a maximum of 1440x1080 px.
Once the preview has appeared you can also edit the image title if you wish:
Uploaded photos automatically go into a default profile album. However, once uploaded you can create additional albums and move the photos between them.
When your image has uploaded scroll down and you'll see the embed codes should you need them.....
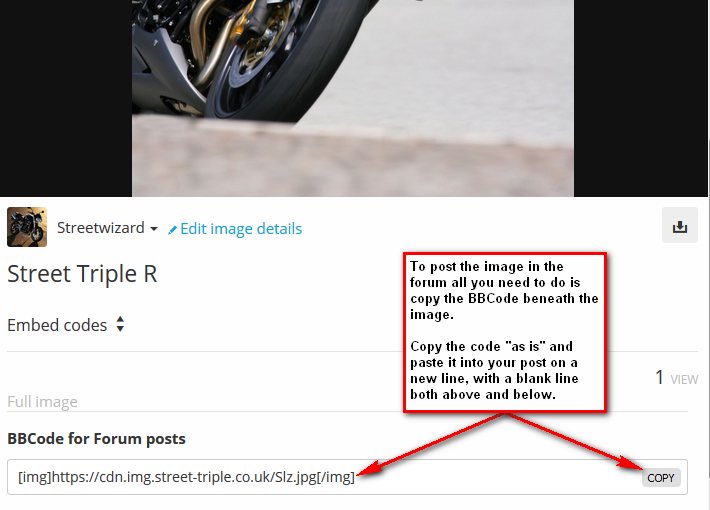
Simply copy the code (the one called "BBCODE for Forum posts") and paste it into your forum post. You need to paste it on a new blank line with a blank line above and below. The code supplied is "ready to use" so no need to add any additional tags.
Note: If your image does not appear after uploading then leave it for a few minutes and then refresh the page in your browser. There can sometimes be a delay if the system is busy and several people are uploading at once. This is because images are put in a queue and you'll need to wait a while. Generally though uploaded images will load in seconds.
4. Create additional albums
When you upload images they are automatically attributed to you, although technically they are not in an album.
However, you can create albums to organise your photos should you wish.
If you look underneath one of your images you'll see an Edit button:
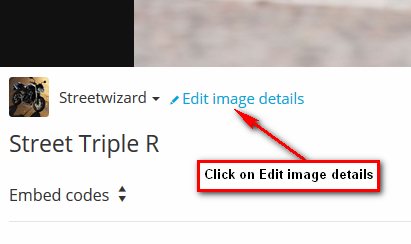
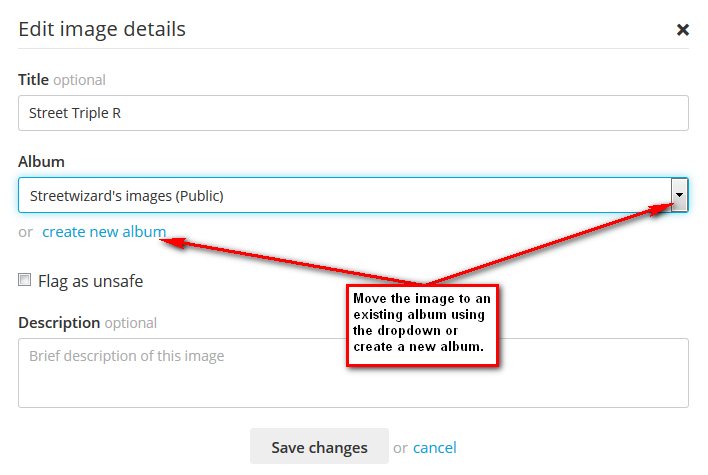
Click on that button and an edit box will popup where you can create additional albums and move images between them:
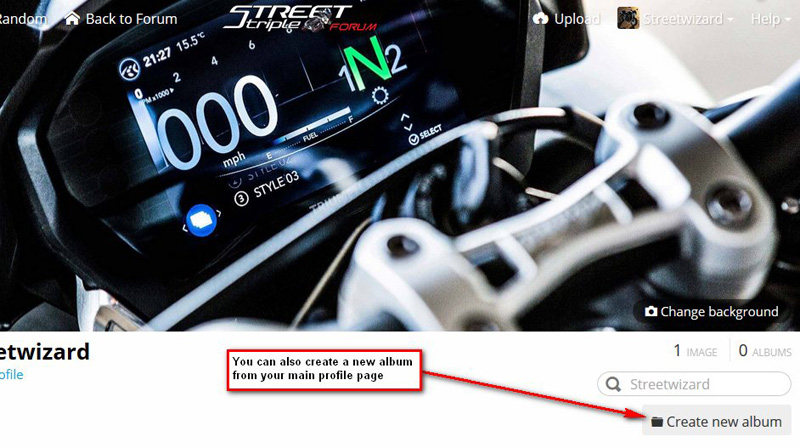
You can also create new albums from your main profile page. See image below:
Note, if you upload multiple images at once (just select them all when you browse to them), then you are given the option to create an album after upload.
That's it !  Now you have a great area where you can store your photos and if required easily embed them into your forum posts.